🔇 前言
在我们的日常生活中,每天上班下班,伴随着我们最多的莫过于红绿灯了。那么,在下面的这篇文章中,我们将手动的来实现一个交通灯。瞅瞅每天都在看的红绿灯,它到底是怎么实现的呢?
🔈 一、需求分析 - 交通灯
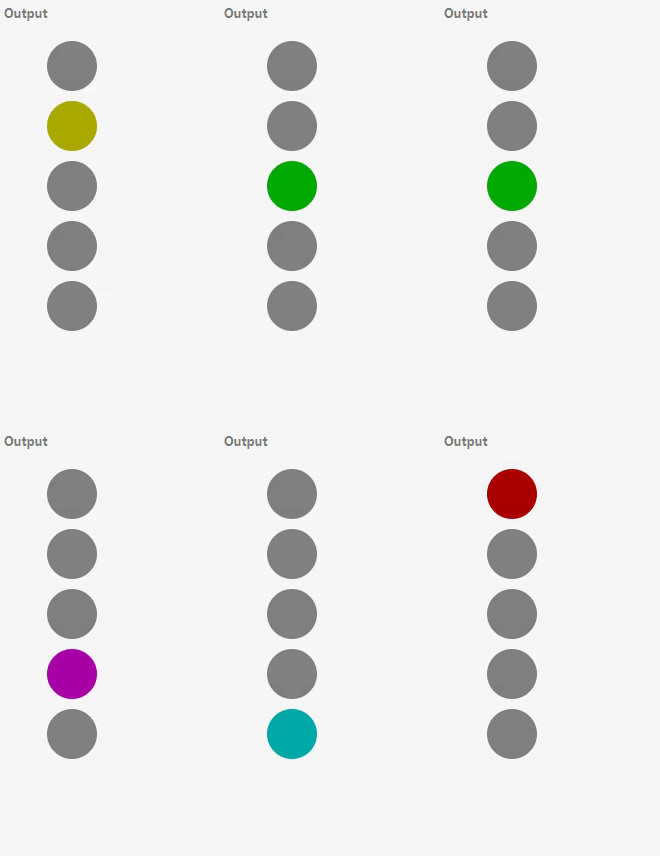
首先,我们想要实现的是可以切换多种交通状态功能的交通灯。如下图所示:

接下来,我们将由浅入深的,讲解多种版本的实现方式。
🔉 二、实现版本
1. 版本一:简单粗暴版
下面先附上代码:
HTML 代码:
<ul id="traffic" class="wait">
  <li></li>
  <li></li>
  <li></li>
  <li></li>
  <li></li>
</ul><ul id="traffic" class="wait">
<li></li>
<li></li>
<li></li>
<li></li>
<li></li>
</ul>CSS 代码:
#traffic {
  display: flex;
  flex-direction: column;
}

#traffic li {
  list-style: none;
  width: 50px;
  height: 50px;
  background-color: gray;
  margin: 5px;
  border-radius: 50%;
}

#traffic.s1 li:nth-child(1) {
  background-color: #a00;
}

#traffic.s2 li:nth-child(2) {
  background-color: #aa0;
}

#traffic.s3 li:nth-child(3) {
  background-color: #0a0;
}

#traffic.s4 li:nth-child(4) {
  background-color: #a0a;
}

#traffic.s5 li:nth-child(5) {
  background-color: #0aa;
}
#traffic {
display: flex;
flex-direction: column;
}
#traffic li {
list-style: none;
width: 50px;
height: 50px;
background-color: gray;
margin: 5px;
border-radius: 50%;
}
#traffic.s1 li:nth-child(1) {
background-color: #a00;
}
#traffic.s2 li:nth-child(2) {
background-color: #aa0;
}
#traffic.s3 li:nth-child(3) {
background-color: #0a0;
}
#traffic.s4 li:nth-child(4) {
background-color: #a0a;
}
#traffic.s5 li:nth-child(5) {
background-color: #0aa;
}JS 代码:
const traffic = document.getElementById('traffic');

(function reset() {
  traffic.className = 's1';

  setTimeout(function () {
    traffic.className = 's2';
    setTimeout(function () {
      traffic.className = 's3';
      setTimeout(function () {
        traffic.className = 's4';
        setTimeout(function () {
          traffic.className = 's5';
          setTimeout(reset, 1000);
        }, 1000);
      }, 1000);
    }, 1000);
  }, 1000);
})();
const traffic = document.getElementById('traffic');
(function reset() {
traffic.className = 's1';
setTimeout(function () {
traffic.className = 's2';
setTimeout(function () {
traffic.className = 's3';
setTimeout(function () {
traffic.className = 's4';
setTimeout(function () {
traffic.className = 's5';
setTimeout(reset, 1000);
}, 1000);
}, 1000);
}, 1000);
}, 1000);
})();此时浏览器的显示效果为:

ok,到这里,我们就基本上完成了交通灯的基本形态。但是呢,是否有小伙伴觉得,在上面的 JS 代码中,有点暴力实现了。首先它是先创建了一个闭包 ()() ,然后呢,之后呢,要切换状态的时候,通过一层一层的 setTimeout() 去进行状态切换,这样子实现的话,不管是从复杂度来讲,还是其他层面上来讲,都是非常的恐怖的。
因此呢,我们要来进行第二版本的改进,对数据进行抽象。
2. 版本二:数据抽象版
先附上代码:
HTML 代码:
<ul id="traffic" class="wait">
  <li></li>
  <li></li>
  <li></li>
</ul><ul id="traffic" class="wait">
<li></li>
<li></li>
<li></li>
</ul>CSS 代码:
#traffic {
display: flex;
flex-direction: column;
}
#traffic li {
display: inline-block;
width: 50px;
height: 50px;
background-color: gray;
margin: 5px;
border-radius: 50%;
}
#traffic.stop li:nth-child(1) {
background-color: #a00;
}
#traffic.wait li:nth-child(2) {
background-color: #aa0;
}
#traffic.pass li:nth-child(3) {
background-color: #0a0;
}#traffic {
display: flex;
flex-direction: column;
}
#traffic li {
display: inline-block;
width: 50px;
height: 50px;
background-color: gray;
margin: 5px;
border-radius: 50%;
}
#traffic.stop li:nth-child(1) {
background-color: #a00;
}
#traffic.wait li:nth-child(2) {
background-color: #aa0;
}
#traffic.pass li:nth-child(3) {
background-color: #0a0;
}JS 代码:
const traffic = document.getElementById('traffic');
const stateList = [
{ state: 'wait', last: 1000 },
{ state: 'stop', last: 3000 },
{ state: 'pass', last: 3000 },
];
function start(traffic, stateList) {
function applyState(stateIdx) {
const { state, last } = stateList[stateIdx];
traffic.className = state;
setTimeout(() => {
applyState((stateIdx + 1) % stateList.length);
}, last);
}
applyState(0);
}
start(traffic, stateList);const traffic = document.getElementById('traffic');
const stateList = [
{ state: 'wait', last: 1000 },
{ state: 'stop', last: 3000 },
{ state: 'pass', last: 3000 },
];
function start(traffic, stateList) {
function applyState(stateIdx) {
const { state, last } = stateList[stateIdx];
traffic.className = state;
setTimeout(() => {
applyState((stateIdx + 1) % stateList.length);
}, last);
}
applyState(0);
}
start(traffic, stateList);此时浏览器的显示效果为:

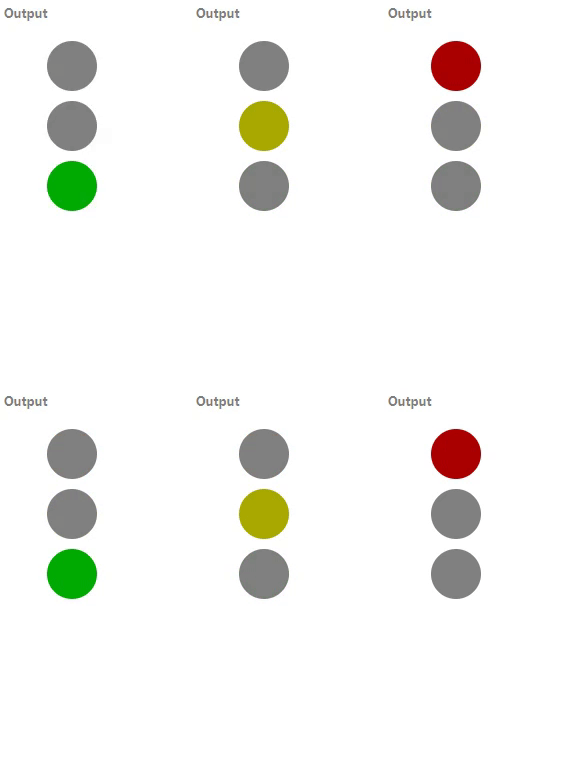
在上面的代码中,我们对等待、停止和通过这三种状态进行数据抽象,首先是接收一组状态,然后再根据这组状态来进行某些指令的操作,比如通过改变元素的 class 来做状态的切换。
我们可以把它理解为是把状态中的数据给封装起来,以此来使得代码更具有扩展性。
但是呢,数据抽象还远远不够,因此呢,接下来我们来介绍第三个版本,过程抽象。
3. 版本三:过程抽象版
先附上代码:
HTML 代码:
<ul id="traffic" class="wait">
  <li></li>
  <li></li>
  <li></li>
</ul><ul id="traffic" class="wait">
<li></li>
<li></li>
<li></li>
</ul>CSS 代码:
#traffic {
  display: flex;
  flex-direction: column;
}

#traffic li {
  display: inline-block;
  width: 50px;
  height: 50px;
  background-color: gray;
  margin: 5px;
  border-radius: 50%;
}

#traffic.stop li:nth-child(1) {
  background-color: #a00;
}

#traffic.wait li:nth-child(2) {
  background-color: #aa0;
}

#traffic.pass li:nth-child(3) {
  background-color: #0a0;
}
#traffic {
display: flex;
flex-direction: column;
}
#traffic li {
display: inline-block;
width: 50px;
height: 50px;
background-color: gray;
margin: 5px;
border-radius: 50%;
}
#traffic.stop li:nth-child(1) {
background-color: #a00;
}
#traffic.wait li:nth-child(2) {
background-color: #aa0;
}
#traffic.pass li:nth-child(3) {
background-color: #0a0;
}JS 代码:
const traffic = document.getElementById('traffic');
function wait(ms) {
return new Promise((resolve) => setTimeout(resolve, ms));
}
function poll(...fnList) {
let stateIndex = 0;
return async function (...args) {
let fn = fnList[stateIndex++ % fnList.length];
return await fn.apply(this, args);
};
}
async function setState(state, ms) {
traffic.className = state;
await wait(ms);
}
let trafficStatePoll = poll(
setState.bind(null, 'wait', 1000),
setState.bind(null, 'stop', 3000),
setState.bind(null, 'pass', 3000)
);
(async function () {
// noprotect
while (1) {
await trafficStatePoll();
}
})();const traffic = document.getElementById('traffic');
function wait(ms) {
return new Promise((resolve) => setTimeout(resolve, ms));
}
function poll(...fnList) {
let stateIndex = 0;
return async function (...args) {
let fn = fnList[stateIndex++ % fnList.length];
return await fn.apply(this, args);
};
}
async function setState(state, ms) {
traffic.className = state;
await wait(ms);
}
let trafficStatePoll = poll(
setState.bind(null, 'wait', 1000),
setState.bind(null, 'stop', 3000),
setState.bind(null, 'pass', 3000)
);
(async function () {
// noprotect
while (1) {
await trafficStatePoll();
}
})();此时浏览器的显示效果为:

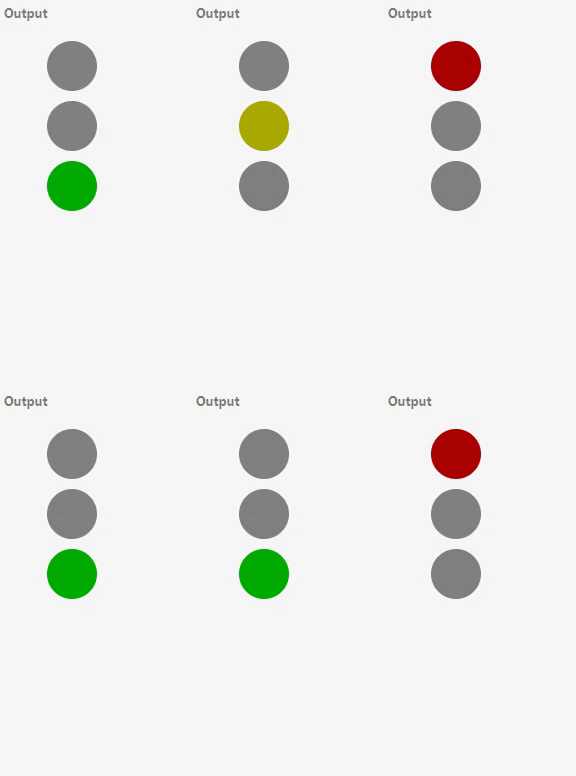
在上面的过程抽象中呢,上面的切换状态呢,是一个典型的轮询操作。所以呢,我们可以抽象出一个轮询方法,来把我们前面的 start 方法抽象成一个轮询方法,然后在这个轮询方法里面呢,我们给它一个 function list ,也就是一系列的操作函数。
之后呢,我们在 fnList 里面取出当前状态的操作函数,最后去执行这个函数。
在上面的这个过程中呢,我们实现的是过程抽象。那其实对于这个例子来说,它是一个异步问题,因此,我们可以通过 promise 、 async 和 await 等方式来解决这个问题。请看下方。
4. 版本四:命令式和声明式
先附上代码:
HTML 代码:
<ul id="traffic" class="wait">
<li></li>
<li></li>
<li></li>
</ul><ul id="traffic" class="wait">
<li></li>
<li></li>
<li></li>
</ul>CSS 代码:
#traffic {
  display: flex;
  flex-direction: column;
}

#traffic li {
  display: inline-block;
  width: 50px;
  height: 50px;
  background-color: gray;
  margin: 5px;
  border-radius: 50%;
}

#traffic.stop li:nth-child(1) {
  background-color: #a00;
}

#traffic.wait li:nth-child(2) {
  background-color: #aa0;
}

#traffic.pass li:nth-child(3) {
  background-color: #0a0;
}#traffic {
display: flex;
flex-direction: column;
}
#traffic li {
display: inline-block;
width: 50px;
height: 50px;
background-color: gray;
margin: 5px;
border-radius: 50%;
}
#traffic.stop li:nth-child(1) {
background-color: #a00;
}
#traffic.wait li:nth-child(2) {
background-color: #aa0;
}
#traffic.pass li:nth-child(3) {
background-color: #0a0;
}JS 代码:
const traffic = document.getElementById('traffic');

// wait操作,即等待多长时间
function wait(time) {
  return new Promise((resolve) => setTimeout(resolve, time));
}

// 设置状态
function setState(state) {
  traffic.className = state;
}

async function start() {
  //noprotect
  while (1) {
    setState('wait');
    await wait(1000);
    setState('stop');
    await wait(3000);
    setState('pass');
    await wait(3000);
  }
}

start();
const traffic = document.getElementById('traffic');
// wait操作,即等待多长时间
function wait(time) {
return new Promise((resolve) => setTimeout(resolve, time));
}
// 设置状态
function setState(state) {
traffic.className = state;
}
async function start() {
//noprotect
while (1) {
setState('wait');
await wait(1000);
setState('stop');
await wait(3000);
setState('pass');
await wait(3000);
}
}
start();此时浏览器的显示效果是:

交通灯的切换可以把它视为是一个不停的循环,那在这个循环里面呢,他会先 setState 一个状态,之后 await 一段时间。后面继续再 setState 一个状态,然后又 await 一段时间,以此类推。
那在实际的应用中,如果我们要对其进行扩展的时候,可以通过修改 while 的方式来进行操作。
🔊 三、在线 online
以上四个版本的在线地址:
📢 四、结束语
到这里,由浅入深的四个交通灯版本的实现就讲解结束啦!
如果换在以前,那我我可能用暴力破解和数据抽象的方法多一点,那通过上文的学习,现在我又多学习了过程抽象和命令式和声明式。
所以说, js 还有很多高阶的内容值得我们去探索和挖掘~
如果您觉得这篇文章有帮助到您的的话不妨点赞支持一下哟~~😉